
IPhone Mail Setup Guide
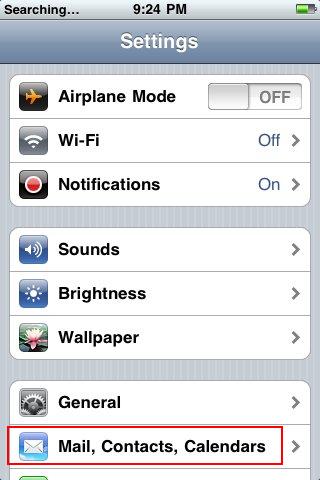
Step 1: From your home screen, click on Settings.

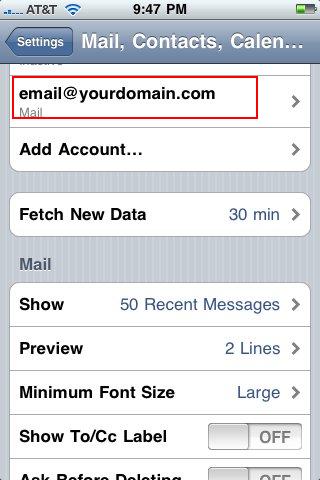
Step 2: Open 'Mail, Contacts, Calendars'.
Click here to edit.
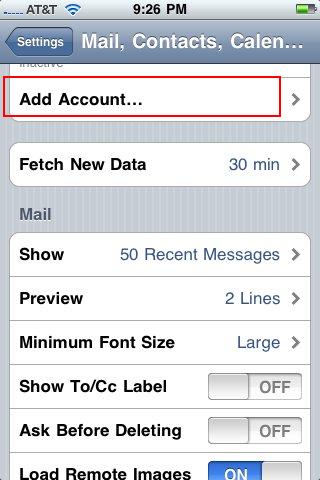
Step 3: Click on 'Add Account'.
Click here to edit.
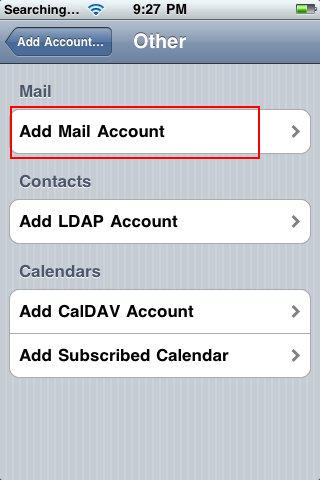
Step 4: Clic on 'Other' button.

Click here to edit.
Step 5: Under the 'Mail' section, choose 'Add Mail Account'.
Click here to edit.
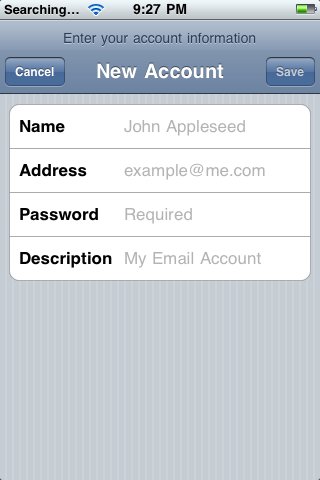
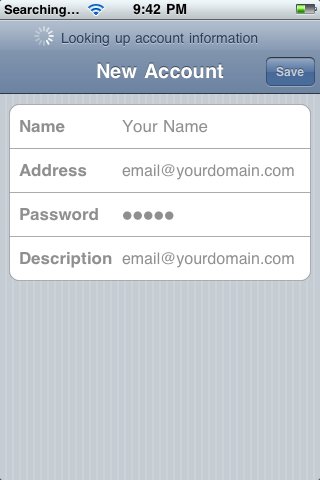
Step 6: Fill in the information on this 'New Account' screen. Your address will be your full email address, and the password will be the password for that address.
Click here to edit.
Step 7: The iPhone will think about your settings, then it will bring you to the next screen...
verify if is necesary to clic on save button
Click here to edit.
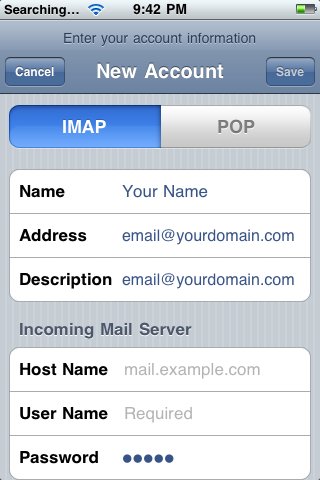
Step 8: Choose between IMAP or POP. As it is a mobile device, we would recommend setting it as IMAP so that the emails are not stored only on the phone.
Under the 'Incoming Mail Server' section, enter the information related with the email account.
Click here to edit.
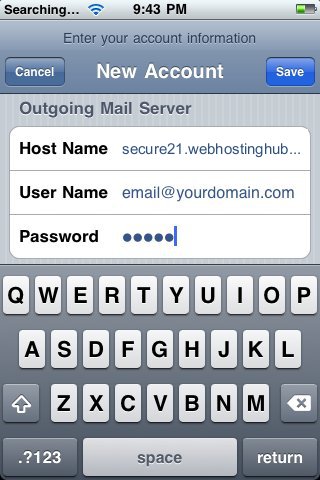
Step 9: Under the 'Outgoing Mail Server' section, enter the same information entered above.
Click here to edit.
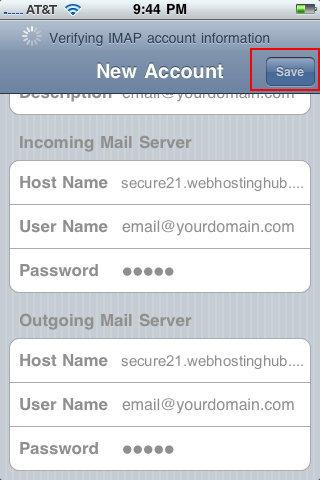
Step 10: Clic on 'Save' button in the top-right corner.
Click here to edit.
Step 11: Once your iPhone has processed the changes, the email account will be created.
Click here to edit.
